Securely storing configuration credentials in a Jupyter Notebook

Art: Mona Lisa with the Keys, Fernand Leger, 1930
Over the past few months, I’ve been slowly working my way to building up an intuition neural nets through a Generative Adversarial Network project based off DCGAN, to generate new artworks in a given style.
Since I’d like to generate abstract art, I’m calling the project GANdinsky.
In order for the network to be able to generate new art, you have to feed it samples of art it can generate from. In other words, you have to create a training set.
One of the best places to get art data to train your neural net is WikiArt. I’ve used the site before for my Soviet Art Bot.
The best way to hit a site like this is usually through its API. However fantastic WikiArt is as a resource, their API doesn’t have the best documentation , so I wanted to hit the API in a bunch of different ways to explore what I could actually get back and get results to feed into my neural network.
The best way to do this, in my opinion, is still Jupyter notebooks. There’s been a lot of debate about whether notebooks are good or bad over the past year or so, but I still find a notebook to be my idea prototyping environment.
Although I love them, I do have a few criticisms of notebooks. Mainly, they don’t do a good job of encouraging best development practices. For example, it’s still hard to work with multiple people in notebooks and use version control well.
Another issue is that you should never store your passwords in the same place as your code. This comes from one of the core tenets of the 12-factor app, which was written a while back by a group of developers at Heroku and walks through best practices for working with code in the modern age.
Apps sometimes store config as constants in the code. This is a violation of twelve-factor, which requires strict separation of config from code. Config varies substantially across deploys, code does not.
(As an aside, I found out that most data people don’t know about the 12-factor app, or at least about that exact way of phrasing “web development best practices”. I only learned about it myself a bit ago.)
Here’s an example of my actual use case. I’ll start by walking through what it looks like with a regular IDE/Python module,and then expand to notebooks.
How to store credentials in a Python program
As preparation to train a neural net, I was pulling some information from the WikiArt API, which had me authenticate with a username and token password, which I had to pass into Python’s requests module from my code.
It looked something like this:
import requests

# not my actual credentials
accessCode = '0928304982jalksjf'
secretCode = 'q0239840asldkfj'

response = requests.get(f'https://www.wikiart.org/en/Api/2/login?accessCode={accessCode}&secretCode={secretCode}')
Now, if you’re including this piece of code in an application, there are a couple of different ways to store it.
First, you can use Vault or AWS Parameter Store, or GCP Secrets Manager or Azure Key Vault
All of these have some assumptions built in, however, and those are that you already have any one of these services enabled, that you have an account that’s set up, and that you access them through some sort of development console.
There is enough friction that it becomes annoying.
So probably the simplest way is to create an config file in the root directory of your project and call it from the code, like so.
├── gandinsky
│   ├── gandinsky.py
│   ├── config.py
where config.py looks like this:
wikiart = {'accessCode': '0928304982jalksjf',
         'secretCode': 'q0239840asldkfj'}
and then your main executable looks like this:
import config as cfg
import requests

response = requests.get(f'https://www.wikiart.org/en/Api/2/login?accessCode={cfg.wikiart['accessCode']}&secretCode={cfg.wikiart['secretCode']')
You add the config file to your .gitignore so you don’t accidentally upload it to GitHub. This way, your code is cleaner and easier to read. If your variables change, you only have to change them in one place as opposed to throughout the file. And, it’s secure.
There are a couple of other different ways to store credentials Pythonically:
- Import from a JSON file
- Import from a YAML file
- Use environment variables with .env
- Use .ini files
- Use ConfigParser
But what about notebooks?
But for notebooks, there is a slight issue of ergonomics and UX. By that I mean that notebooks are different from a codebase in that they’re meant to be interactive, used by a single person, quickly iterative, and used mostly for throw-away work that gets scrapped and hardened once you go to production.
Usually what this means for me is that I end up storing passwords in them, forgetting they’re in there,and committing them to version control, where everyone else can see them.
And, when you’re working in a notebook as part of Jupyter in the browser, instead of having the list of folders available in your IDE it’s just a bit more annoying to get to, unless you use JupyterLab out of the gate.
I personally still have to get used to running
jupyter lab
instead of
jupyter notebook
at the command line.
Additionally, Jupyter notebooks don’t surface hidden files,like .env or .gitconfig by default - you have to enable them with a command that’s so far only available in a GitHub repo:
jupyter lab --ContentManager.allow_hidden=true
With all of this in mind, I went to ask Twitter what their standard way of using credentials in notebooks was, and whether it differed from “regular” Python development:
The amount of answers was just as enlightening as the actual answers themselves. It looks like, while everyone agrees that credentials and code should be separated, they’re not in agreement on how, exactly.
A few different trends emerged, depending on whether you’re working in locally or in the cloud, and I’ve elaborated on them here.
Storing Jupyter Credentials Locally
Environment variables
- Environment variables are the winner, and the python-dotenv package makes it easy:
You first create a .env file, which is just a text file containing variables and comments. The Python dotenv librarly, when you call load_dotenv, detects the file, and passes the variables into your system’s environment variables, where you can pull them out with the os library.
This file needs to be excluded from version control by adding the following to your .gitignore:
Notebook Example:
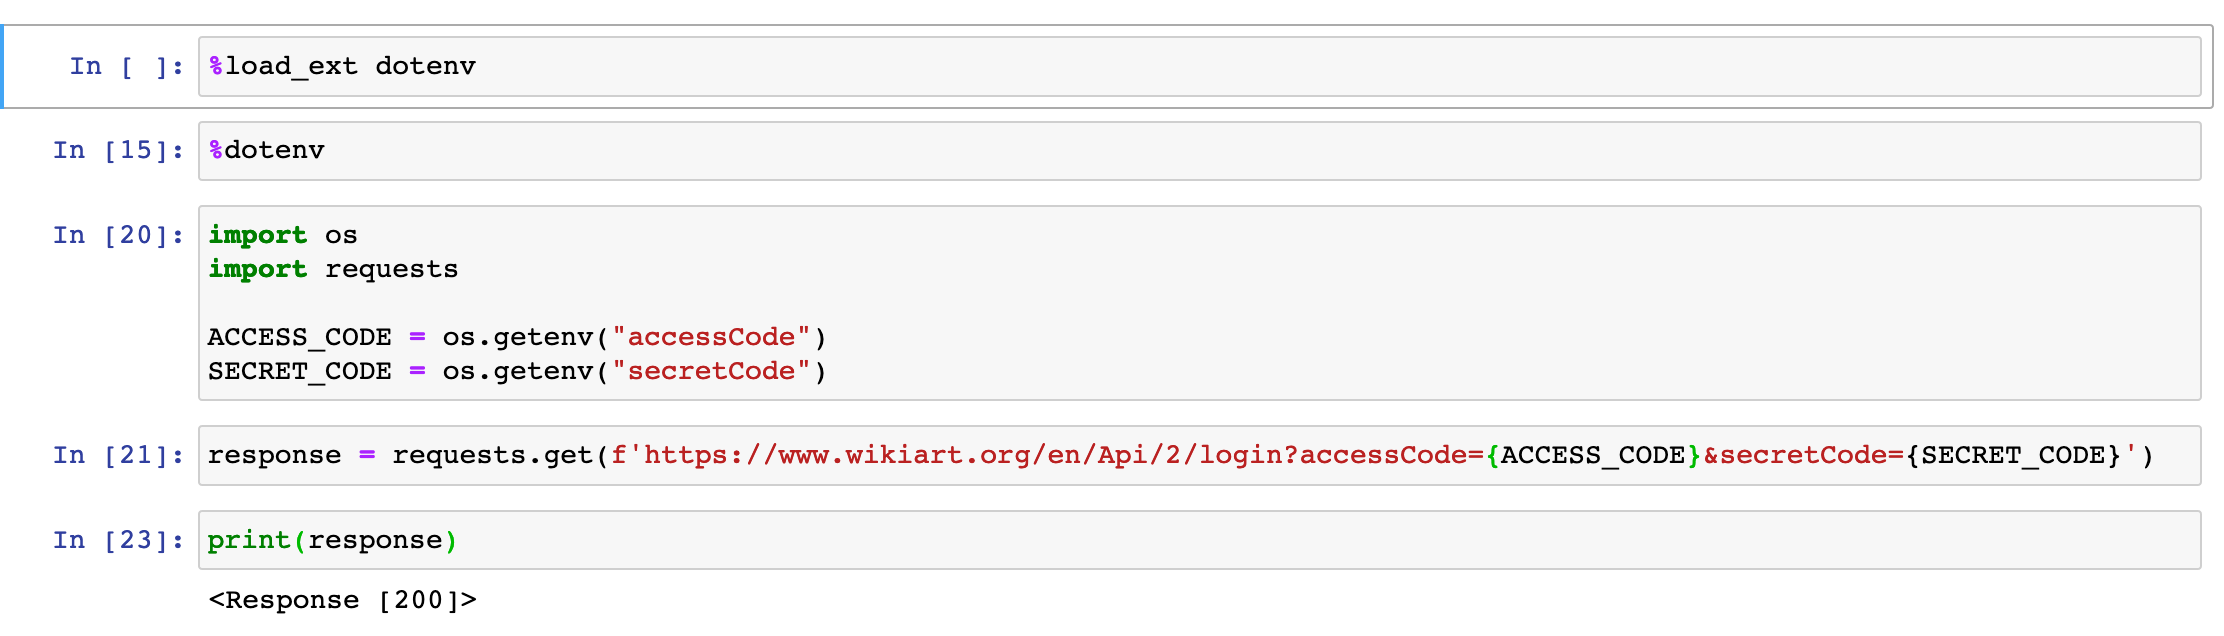
Code:
# magics for import statements
%load_ext dotenv
%dotenv

import os
import requests

ACCESS_CODE = os.getenv("accessCode")
SECRET_CODE = os.getenv("secretCode")

response = requests.get(f'https://www.wikiart.org/en/Api/2/login?accessCode={ACCESS_CODE}&secretCode={SECRET_CODE}')
However, there is a caveat. If you end up using this file on someone else’s computer, or sharing it across a server, you’ll need to find a way to bring your own .env file with you, either by transferring to the server or putting in the cloud.
However, since these are API credentials, they should be unique to you, which means that anyone pulling down the codebase won’t need to change anything - they’ll already have their own .env file that will populate the variables. This is part of the beauty of the 12-factor app: no hard-coding and no searching through notebooks for hard-coded values.
An even simpler way, without using .env, is to pull directly from your environment variables. If you’re operating some kind of *nix or Mac system, they’ll be in your ~/.bashrc and ~/.bashprofile. Then, you can pull them out with os.environ.get() instead of os.getenv. For more on the difference between the two, check out here.
Getpass
This library allows you to interactively type in a password that is hidden unless you call the variable. It’s not saved in any envrionment variables, but could be useful for more interactive work.


Code:
import getpass
ACCESS_CODE = getpass.getpass()
SECRET_CODE = getpass.getpass()
print(f'ACCESS_CODE:{ACCESS_CODE}')
print(f'SECRET_CODE:{SECRET_CODE}')
YAML (or JSON) config file
There’s a whole plethora of external config files you can include with Python, including JSON and YAML.
There’s a little bit of catch here because it’s more annoying to work with files outside of Jupyter notebooks, but if you run Jupyter lab, you can see and edit the .yml file in the sidebar.
In theory, YAML is more complex to generate, but more universally compatible than JSON: its spec is a superset of JSON, and it’s extremely popular as a templating language these days.
https://twitter.com/vboykis/status/1098950011415597056?s=20
config.yml
api_creds:
    access_code: 0928304982jalksjf
    secret_code: q0239840asldkfj
notebook.ipynb
import yaml

with open("config.yml", 'r') as ymlfile:
    cfg = yaml.safe_load(ymlfile)

print(cfg['api_creds']['access_code'])
print(cfg['api_creds']['secret_code'])
Here’s the actual notebook screenshot:

Keyring
This is a way to integrate with your local system’s password management system. From a great exaplanation:
The keyring module provides a wrapper around your system’s password store: for example, the OS X Keychain, or the Windows Credential Vault. These typically provide much more security than keeping the password in source control, or in another file that gets included at runtime. And they’re entirely decoupled from your source code: if you always use keyring, you never have to worry about forgetting to expunge secrets from your code.
You can use it in combination with getpass so you don’t type your credentials in plaintext:
import keyring
import getpass

ACCESS_CODE = keyring.set_password('wikiart_api', 'ACCESS_CODE', getpass.getpass())
keyring.get_password('wikiart_api', 'ACCESS_CODE')
Papermill
Papermill is a tool to make notebooks more production-y. From the docs, the main purpose is to parametrize notebooks (aka add parameters that you can pass in when you execute notebooks from the command line), and execute a series of notebooks in concert.
I’m still not entirely clear on how secrets would be handled here since they don’t support them explicitly, per this GitHub issue but it’s worth exploring if you plan on doing more with it, like creating notebooks that can be run at different times with different values. Here’s a good example of that workflow.
Storing Credentials in the Cloud
There is an additional workflow you can use if you’re working with notebooks that are in the cloud. In theory, you can use any of the above methods, but what each cloud provider does nicely is store credentials.
You could also use these credentials if you’re working locally, but my personal opinion is that, unless you’re sharing code in a repo, all they’ll do is provide you unnecessary overhead when any one of the local variants will work.
I’m going to talk about AWS secrets, because it’s the one I’m most familiar with, but Google and Azure also have variants of this that you can use in a similar way.
AWS Secrets
AWS Secrets is the one I’m most familiar with. It’s a way to store any credentials in a cryptograhically safe way.
Don’t forget! Cloud services are not free. Current Secrets costs are:
$0.40 per secret per month
$0.05 per 10,000 API calls
If you’re already either using notebooks in EC2 or Sagemaker, or have the flow hooked up to an online workflow like through GitHub/GitLab or CI/CD, it’s worth accessing them here
You can put them in through the AWS GUI:

Ideally you’d also rotate these, particularly if you’re working with an app that you wrote yourself.
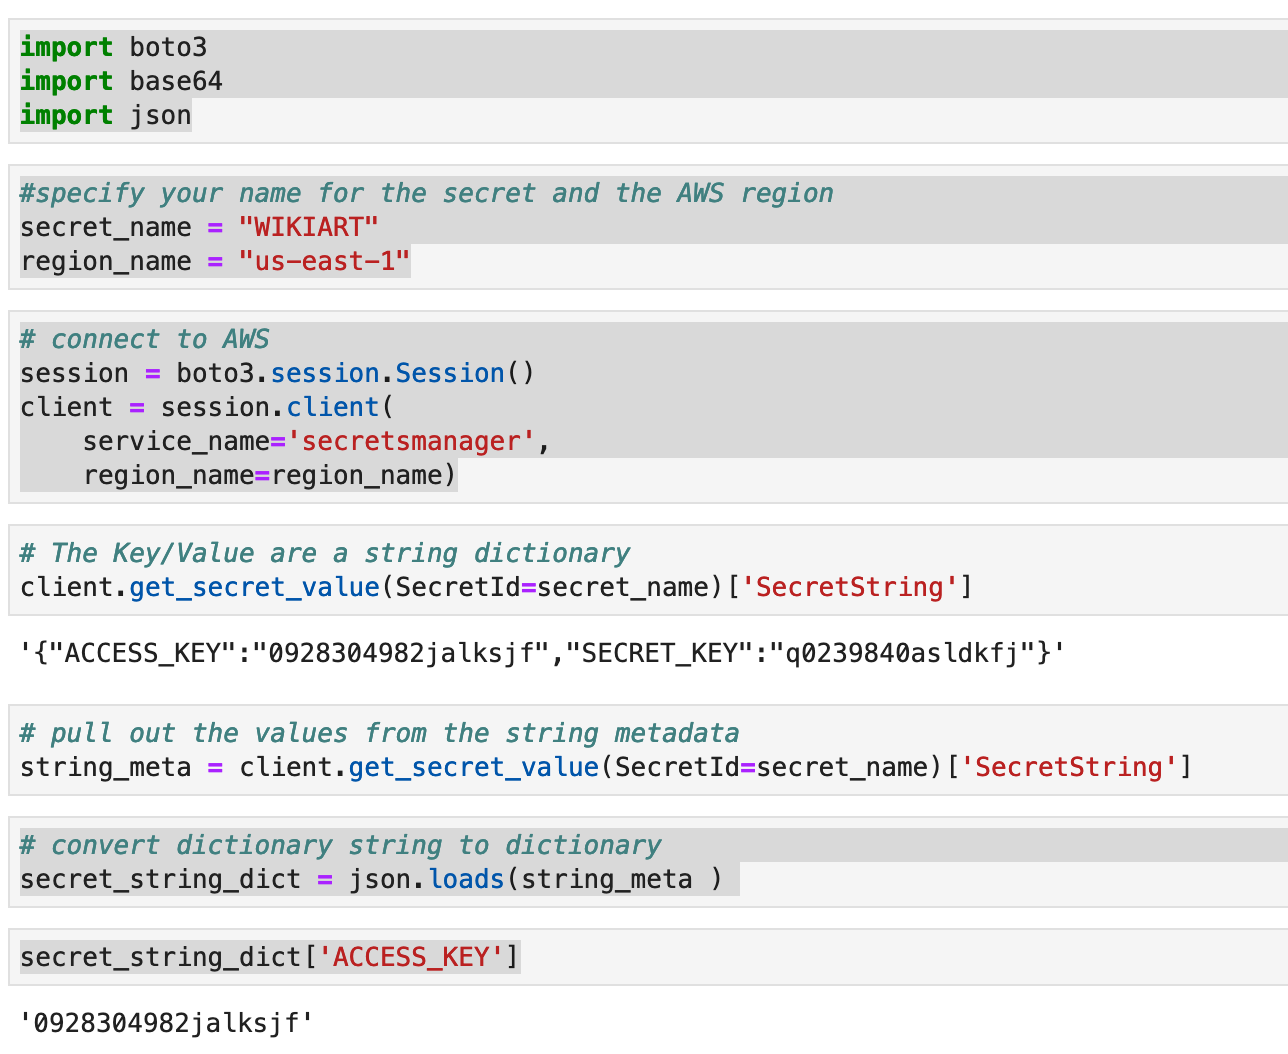
And then access them in your notebook. As you can see, it’s a lot of boilerplate code, so it makes sense if you’re already working in the cloud and accessing other services.
import boto3
import base64
import json

#specify your name for the secret and the AWS region
secret_name = "WIKIART"
region_name = "us-east-1"

# connect to AWS
session = boto3.session.Session()
client = session.client(
    service_name='secretsmanager',
    region_name=region_name)

# pull out the values from the string metadata
string_meta = client.get_secret_value(SecretId=secret_name)['SecretString']

# convert dictionary string to dictionary
secret_string_dict = json.loads(string_meta )

secret_string_dict['ACCESS_KEY']
That’s it! Go forth and hide your credentials. :)
To edit this post, open a pull request.